Have you ever been tempted to cut your own hair? I think we have all had that moment where we think ‘oh I'll add a quick fringe’ or ‘I wish my length was short’.
Following from that we’ve all probably had that moment where this impulse hasn’t gone to plan and a much-needed trip to the hair salon was next on the list.
And I can guarantee we have all had the ‘my mom cut my hair.’ moment.
Now we all find ourselves in the Covid-19 situation: A trip to the salon is virtually impossible!
Cutting your hair with no plan or the incorrect tools is a recipe for disaster even for professionals.
As a stylist I never recommend fully cutting your own hair, stylists have gone through years of training, and have a world of knowledge to be able to do this.
If you are going to attempt it I will give you a few useful tips and will share some easiest hairstyle to help you.
Invest in some proper hair scissors, the kitchen ones are not designed to cut hair and will give you an uneven finish.
Professional scissors range from $100-$600+ however these scissors are great for use on your own hair.
You may also want some clippers, these are great as they come with clipper guards, oil, combs etc.
You may want to invest in a razor if you want more of a textured style. This one comes with the razor and razor blades.
Now you have the correct tools, let's have a look at some haircuts, these are the three easiest ones to do yourself, although if someone can do it for you, you may get a better result.
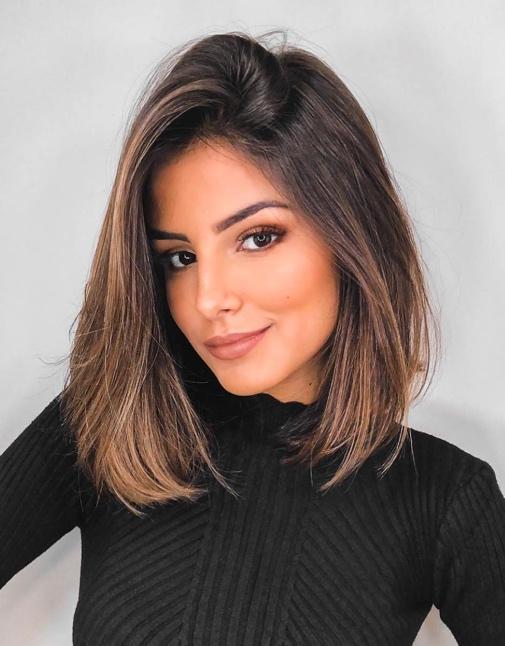
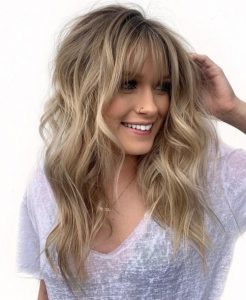
This is a very popular haircut in salons at the moment, and it is also worn amongst many celebrities, it is versatile in length and can be worn curly or straight.
If your hair is wavy - curly you may want to think about blow-drying and straightening your hair first and cutting the hair dry.
Otherwise cut the hair wet.
We are going to do this haircut in two halves, see below for the how to:
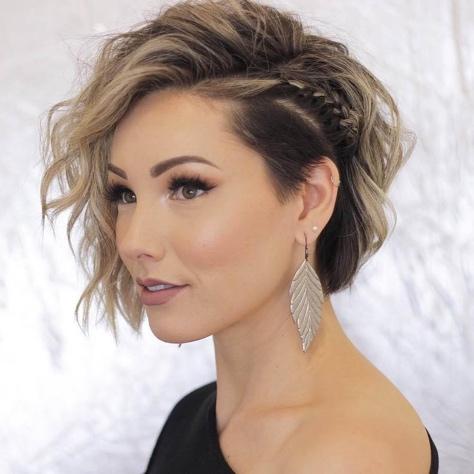
Undercuts are another huge popular trend that has come in these last few years, and they are perfect for most hair types. They are great if you want something a bit different or if your hair is thick, as it will remove some of the heaviness.
Here are a few different types.
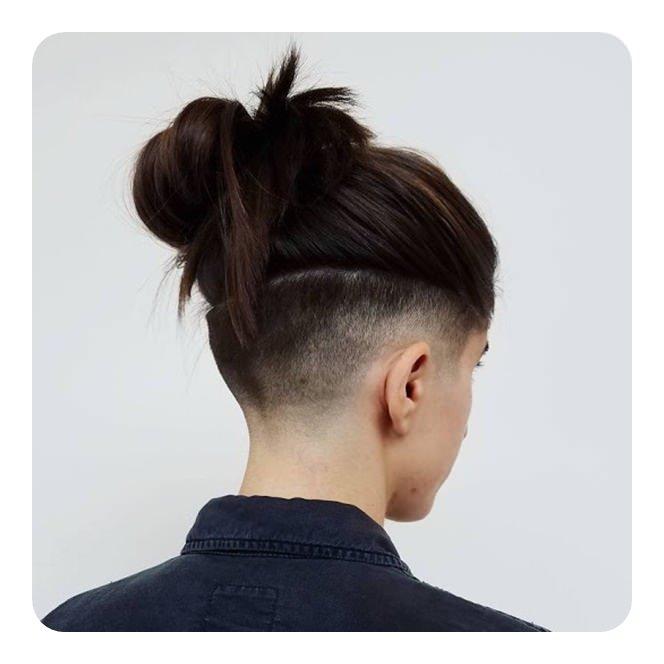
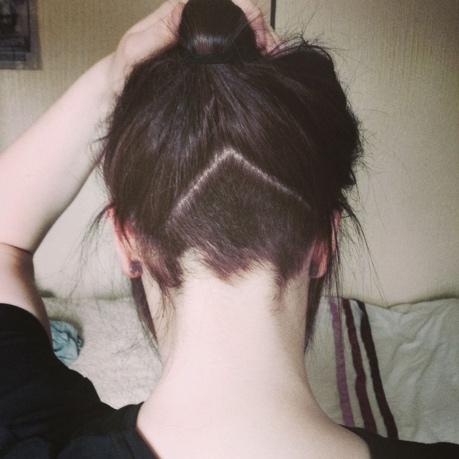
The first step is to decide where you want your undercut, do you want it on the side or at the back of the neck.
Next once you have done that you need to decide how short you want the undercut, see the table below, my go-to guard for an undercut is a #3.
Clipper Guard | Hair Length (In Inches) | Hair Length (In MM) |
1/2 | 1/16 | 1.5 |
1 | 1/8 | 3 |
2 | 1/4 | 6 |
3 | 3/8 | 10 |
4 | 1/2 | 13 |
5 | 5/8 | 16 |
6 | 3/4 | 19 |
This needs to be done on dry hair.
Firstly, to carry out cutting the length we are going to use the same technique shown for The Long Bob Haircut.
If you would prefer this to be choppier you can go over the ends with the razor once finished.
The razor must be used on wet hair before being blow-dried.
To use the razor, use gentle pressure, and the razor at a 45-degree angle, lightly brush the razor from about 4 inches up the hair to the ends.
To create a slight layer, simply section off a small round section over the crown, pull the hair straight up from the head, and point cut to the length you want, don’t take too much off!
Always do this on dry hair, by blow drying all the hair forward first.
There you have it! Three simple cuts that you can carry out at home!